E17 | Outdoor Shower | Ask This Old House
Season 23 Episode 17 | 23m 42sVideo has Closed Captions
Jenn, Mark, Nathan, and Richard team up to build a cedar outdoor shower in Cape Cod.
The AskTOH team heads to Cape Cod to help a couple build an outdoor shower that embodies the Cape's coastal charm. Jenn Nawada and Mark McCullough design the layout and handle the drainage system; Nathan Gilbert assembles and installs the cedar enclosure kit; Richard Trethewey tackles the hot water hookup and installs the shower system; while Jenn and Mark add the final landscaping touches.
Problems with Closed Captions? Closed Captioning Feedback
Problems with Closed Captions? Closed Captioning Feedback
Funding for THIS OLD HOUSE is provided by The Home Depot and Renewal By Andersen.
Support provided by:

E17 | Outdoor Shower | Ask This Old House
Season 23 Episode 17 | 23m 42sVideo has Closed Captions
The AskTOH team heads to Cape Cod to help a couple build an outdoor shower that embodies the Cape's coastal charm. Jenn Nawada and Mark McCullough design the layout and handle the drainage system; Nathan Gilbert assembles and installs the cedar enclosure kit; Richard Trethewey tackles the hot water hookup and installs the shower system; while Jenn and Mark add the final landscaping touches.
Problems with Closed Captions? Closed Captioning Feedback
How to Watch Ask This Old House
Ask This Old House is available to stream on pbs.org and the free PBS App, available on iPhone, Apple TV, Android TV, Android smartphones, Amazon Fire TV, Amazon Fire Tablet, Roku, Samsung Smart TV, and Vizio.
Keep Exploring


This Old House Insider Newsletter
Get This Old House exclusive stories, tips, and behind-the-scenes information delivered right to your inbox every month.Providing Support for PBS.org
Learn Moreabout PBS online sponsorship♪♪ Kevin: On "Ask This Old House," our experts travel across the country to answer questions about your house.
♪♪ Today, "Ask This Old House" goes to Cape Cod to build an outdoor shower.
Jenn: I'm thinking the shower could lay right between those two windows.
Kevin: Mark and Jenn team up to take care of grade.
Mark: Nice.
Kevin: Nathan's going to build the enclosure.
And Richard's going to take care of the plumbing.
All that on "Ask This Old House."
Jenn: Hi, everybody, and welcome back to a new episode of "Ask This Old House."
I'm here on Cape Cod, a very popular destination place for New Englanders during the summer months.
What I really like about the Cape is that people spend most of their time outside, and it a truly reflects in their landscapes and outdoor spaces.
But it's not just for vacationers.
People do live here, and I just had a couple write in about a special thing that they want to do in their outdoor space.
Hi, buddy!
Hi.
Gavin: Hey.
How's it going?
Jenn: Colleen.
Gavin.
Colleen: Welcome to Cape Cod.
Gavin: Nice to meet you.
Thanks so much for coming.
Jenn: Happy to come down.
And this is?
Colleen: This is Raffi.
Jenn: Hey, Raffi.
How are you?
So tell me a little bit about the place.
Colleen: So, we were living in Boston for a while.
And we just a couple months ago bought the house, and we've been spending some time upgrading things, renovating.
Jenn: Mm-hmm.
Gavin: Yeah, we had to get the house actually, like, ready for the winter.
So we upgraded the electrical, stripping all the heating, and then adding, like, a new water heater, to get the inside of the house ready.
And now we're ready to work on the outside of the house.
Jenn: Fantastic.
I mean, this yard is beautiful.
Gavin: Yeah.
We got it for him.
Jenn: You want to show me the backyard where you guys wrote in about?
Let's go.
Colleen: Yeah, we can go check it out.
Jenn: Come on.
Gavin: Yeah, so this is our back patio here.
We just got the deck furniture put in.
Jenn: Okay.
Gavin: The grill.
We got a fire pit out back.
Colleen: We really love it.
I feel like we have so much potential.
But the one thing that's kind of missing right now is an outdoor shower.
You know, it's the Cape.
I feel like that's very much the vibe.
And it'd be kind of cool to have, like, a contained space to wash the dog, too, out here.
Jenn: Awesome.
Because outdoor showers are one of my most favorite things outside.
And if you're at the Cape, you definitely have to have one.
Colleen: Yeah.
Jenn: So, I mean, where are you thinking location-wise?
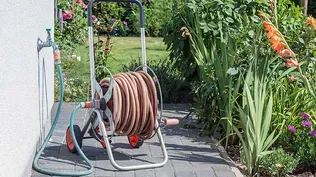
Colleen: So we were thinking between these two windows right here.
We've already got the hose there, so... Jenn: Okay.
Colleen: That's kind of what we had in mind.
Jenn: Alright.
So what I have in mind is pencil, paper, tape measure, do a design plan for the area just to reconfigure the space, and then come up with a game plan.
Colleen: Sounds great.
Jenn: Alright?
Colleen: Thanks.
Jenn: Alright, let's do it.
Hey, guys.
Colleen: Hi.
Jenn: Alright, so now that I have a better sense of the space with all the measurements, I want to show you the layout.
Colleen: Okay.
Jenn: So if we look at it from this perspective, I'm thinking the shower could lay right between those two windows.
Right?
And then going down, I think we really need to fill in that window, because I don't want any back splash of water going inside the house.
Gavin: Okay.
Jenn: And then we'll have to move some of the plants, that Rose of Sharon, those rhododendrons, but those are easily transplantable.
And then from there, we could talk about how to keep the water away from the house.
We'll come up with a drainage plan, and then we're going to use gravity, and we'll follow the natural slope of the yard and come up with a plan for that.
Colleen: Okay.
Jenn: And then the flooring for the whole space, I was thinking natural stone, either stepping stones or bluestone or something that we could just integrate to make it that natural feel.
Colleen: That sounds nice.
Jenn: This is going to take a couple days if you're alright with that.
Colleen: Yeah, absolutely.
Jenn: Alright.
So let's get started with clearing out this bed.
And then, Gavin, why don't you rake out all the leaves?
Colleen and I will start with the little rhododendrons.
Colleen: Can I grab it?
Jenn: Yeah.
Grab it and put it in the wheelbarrow.
And then we'll get the Rose of Sharon out of the way.
Nice.
Colleen, Gavin, I want to introduce you to Mark.
Colleen: Hi!
Mark: Hi, Colleen.
Colleen: Welcome.
Gavin: How's it going?
Thanks for coming.
Mark: Thanks for having me.
Jenn: I wanted him to talk about drainage today.
Just to catch you up, this is where our shower enclosure is going to go, between these two windows.
And let's talk about drainage.
What do you think?
Mark: Alright, well, first off, I'm looking at a couple things, gutters and downspouts.
So you guys are doing a great job already managing the water.
I'm looking at the slope of the yard.
That's perfect for us, because in this instance, gravity is our friend.
So when we're doing this, we just want to make sure that we have ample pitch on this pipe that we're going to install, and we're going to want to carry the water out of here as fast as we can.
Jenn: Yeah, because everything is directed away from your home.
Gavin: If you're digging the hole here, how do you avoid it going back into the house?
Mark: Okay, so, great question.
What we don't want is water backing up into the foundation and then back into the basement.
So that's why it's really, really critical that we take this pipe and really pitch it and just run it as far away from the house as we can.
Gavin: Okay.
Cool.
Mark: Alright?
Jenn: Alright.
So if everyone agrees to that, we got a lot of digging to do.
Mark: Yep.
Let's get some tools.
Jenn: Let's go get 'em.
Mark: We can get going.
While this job could be dug by hand, it would take forever.
So I've brought my mini excavator to do the job.
I own this one, but you can rent them, too.
With the grading we're doing, the water should be redirected away from the house.
We're going to apply a leak proof barrier to the foundation as an extra layer of protection to keep the water out of the basement.
Jenn: [ Grunts ] Mark: Next, we're going to add a layer of crushed stone to the base of the trench to help with drainage.
Now we can add the pipe.
This is a perforated pipe that will help direct the water away from the house and down the hill.
The landscape fabric wrapped around the pipe will protect it from the gravel we're going to cover the rest of the pipe with.
Alright, so now it's time for the fabric paper.
So, Gavin, Colleen, you guys can start fitting it to those two gullies and then just start kicking dirt down to hold it.
Jenn: Alright, guys, so let's just broadcast all this seed all the way down the disturbed areas, and I think it's going to blend in perfectly when it fills in.
It takes about 7 to 14 days to germinate.
And if you could just water it morning, evening, or just keep an eye on it.
Colleen: Okay.
Gavin: Sweet.
Awesome.
Colleen: Yeah, we can do that.
Gavin: Yeah, this was -- this was a lot of work.
Mark: Okay.
Lot of work, but I'm happy as heck.
I know you are.
The most important part in this whole thing was getting that pitch right.
We did that, so this is going to be good to go.
Jenn: Yeah.
And so I think that's it for today.
I think we've earned our day's keep.
And it's time to bring guy number two in, Nathan, and he's going to do the carpentry.
And then we'll have Richard come do the plumbing, and then we'll come back in and situate where the stepping stones and surface goes.
Alright?
Colleen: Sounds great.
Gavin: Awesome.
Jenn: Alright.
Nice work.
Mark: Alright, Jenn.
You, too, man.
Alright.
Jenn: Alright.
Nathan: I'm on my way to the outdoor shower project.
And in my opinion, we're heading the right direction, down to the Cape and Islands.
I love going down to the Cape and Islands.
I do a lot of work there with my dad.
They're always using red cedar, white cedar, and one thing you always have to have on a Cape and Islands home is a beautiful outdoor shower.
Jenn's updated me with some pictures.
Mark McCullough's gone over and filled in the old window hole.
I got the materials I need.
We're ready to get started.
Hi, Colleen.
Colleen: Hi, Nathan.
Welcome.
Nathan: Nice to meet you.
Colleen: You, too.
Nathan: So this is the shower kit that I picked up.
Colleen: Great.
Nathan: What's great about a shower kit is a lot of it already kind of comes pre-assembled.
Door's already made.
Panels are already made.
Posts are even mortised to receive the panels.
I chose white cedar.
It's really easy to work with, ages beautifully, and on the Cape, it's almost a staple to have a really nice cedar outdoor shower at your house.
What's great about this kit, as well, is it comes with a box of accessories that we need to assemble everything.
So we have our post cap, we have hinges, and we have latches to get everything done in a day.
What do you think?
Colleen: Sounds awesome.
Nathan: You like it?
Colleen: Yeah.
Nathan: Let's get started.
Colleen: Okay.
Nathan: Alright.
We're gonna get started by mounting our two cleats to the wall.
We're going to go about an inch off of that window.
And what I'm doing is just setting up for pre-drilling, and I want to go on the high points of your shingle tips.
So I'll just make a rough mark.
We'll go over to our workbench.
We'll find center.
We'll pre-drill.
So now we have these nice structural screws that we'll get started, and then we'll tighten them up on the wall.
Colleen: Okay.
Nathan: So I already have a mark at 1 inch off of that window.
So I'll watch that.
And then we'll bring it up to our height right there.
Double check our 1 inch.
And then if you want to put that 4-foot level on.
So we'll pivot off of that 1-inch mark right there.
Look good?
Colleen: Yeah.
Nathan: Now we can set our left cleat off my middle mortise.
Alright, if you want to move your cleat up until it gets to that hole?
Right there.
Alright.
That looks good.
Now we can put our panels in.
I'm gonna pre-drill.
One screw.
Next hole.
Alright, as a little layer of protection, I'm gonna throw a couple blocks under it.
Let's do this panel now.
Alright, you got it?
Colleen: Mm-hmm.
Nathan: Alright, let's start by setting this left post.
Right into those mortises.
We want to just check plumb in both directions.
So we're just making sure it's in the ballpark.
Good there.
And then check the other side.
Alright.
That's good.
Alright, now we need to kind of start isolating these.
We want to make sure they're not flopping out here.
So we're going to put a temporary brace across the top.
Alright.
Now we're ready to start back-filling these posts.
So you'll notice we have the two outer posts locked out.
Everything's plumb, and everything's level.
What I'm going to use to back-fill this post and the middle one is some of this crushed bluestone.
It's going to compact nicely.
If you want to grab your hose, we're going to add a little bit of water as we back-fill.
Alright.
You want to grab that tamping stick?
Hit all four sides.
Alright.
Alright.
You want to start hosing that down, like, light mist, and I'll work it in?
Colleen: Sure.
Nathan: Perfect.
Colleen: Oatmeal, right?
It's supposed to look like oatmeal.
Nathan: You remembered.
Colleen: Yeah.
I've seen the show.
Nathan: Alright, we're ready to set this post and this panel.
We need to go in as a kit here, so we're going to set this post in on an angle.
And now you're going to sandwich this panel in between.
So you got the panel?
Colleen: Yep.
Nathan: Okay.
Colleen: I think it's got to come forward.
Yeah.
Nathan: Okay.
Alright, so I already did the layout, and I did some pre-drilled holes.
But we're going to add these hinges onto the face of this door.
So we have two holes for the wood screws, and then we have a carriage bolt that's really going to sandwich everything together.
Colleen: Okay.
♪♪ ♪♪ Put that spacer on the top right.
♪♪ ♪♪ Okay.
So we got some trim work that we got to do.
We have to add stops to the inside of the door, and then we have a cap for on top of our panels and also a little piece of fascia board there.
Alright, Colleen, what do you think?
Colleen: I love it.
This is awesome.
Nathan: Give it a try.
Colleen: It's great.
Nathan: Yeah, it came out nice.
Colleen: Yeah.
Nathan: Alright, well, I'm gonna let the crew know that we're ready.
We'll be back in a couple of days to finish everything up.
Colleen: Okay.
That sounds great.
Nathan: See you later.
Colleen: Thank you.
Jenn: Richard, thank you so much for coming to help us with this outdoor shower project.
Richard: Glad to help, and any reason to get to the Cape is okay with me, and hang with you guys.
Mark: Alright.
And, Richard, I bet you have more than a few outdoor showers in your résumé.
Richard: I do.
I mean, I've always had one at my own house.
Both of my boys, first thing they did was put an outdoor shower in.
And even though it's a short summer season here in New England, nothing better than an outdoor shower.
Jenn: Totally, yeah, totally agree.
And I really think we're going to finish this project today.
Richard: Good.
Jenn: It looks like Colleen and Gavin are already out here.
Richard: Hello, guys.
Gavin: How's it going?
Nice to meet you.
Richard: I'm Richard.
Gavin: Gavin.
Thanks for coming.
Colleen: I'm Colleen.
Richard: Nice to see you.
Colleen: Hi.
Jenn: Nathan did a nice job putting this together.
Richard: Of course he did a great job.
Jenn: I mean, but it's extra beautiful.
Richard: Alright.
You guys want some water, I imagine, right?
Gavin: Yes.
That would be great.
Richard: See what you got.
Oh, you already have water.
You actually want hot, too?
Gavin: I would love that.
Richard: Okay, well, we can work on that.
Alright.
You want to be my assistant today?
Gavin: Would love that.
Richard: Great.
Jenn: And, Colleen, we need your help finishing off the landscape.
Colleen: Sounds great.
Gavin: Let me show you the bulkhead.
It's where all the plumbing is.
Richard: Alright, Gavin.
So here is where your outside faucet connects to the cold water supply right here.
You've got a well system.
And so what we can do is just cut this back, and now we don't have to think about too much on the cold water side, but we still need hot water.
So you've got a bathroom right here with cold and hot.
So what we can do is cut a "T" in and run a new PEX line over there for hot and cold.
Gavin: Okay.
Richard: Alright.
Now, the question is, what are the choices?
So this is sort of a primer on sort of all the ways you can get an outdoor shower.
In warmer parts of this country, they might just have an outdoor, you know, couple of faucets, and they might run it to a hose and mix it.
But you have to worry about in colder climates, all of a sudden it's freezing.
All of a sudden, you've got full pressure, because the washer is right there.
Now, what you've got is this frost proof sillcock.
And that has the shut off way inside here, so it means it'll never freeze in any weather, which is great.
So we could just leave that one in there and then add a second one for the hot.
And once we do that, it would be frost proof.
And then they make just a splitter device like this that has just hose connections.
You'd make that, and then this would go out to a hand shower.
Now, they also take the same idea, frost proof, and put it into a hot and cold wall hydrant.
But we're going to try to use something like this to give you a proper shower.
Gavin: Okay, great.
Richard: Okay?
So what I'd like to do is to talk to you about combining the frost proof angle here with the single control, and that's this thing.
Now, this is -- got the shut offs way back in here, so it gives you frost protection.
And then you turn on the supply right here, and you set the temperature right here.
Isn't that good?
Gavin: Yeah, yeah.
Richard: And the most important thing is, I talked to Colleen.
She wants this dark finish.
Okay?
Alright, so let's get started.
We'll turn the water off.
Gavin: Sounds good.
Richard: First, I want to cut into the hot water line and install a copper to PEX "T" fitting.
Then I can run a hot water line and a shut off valve to the existing location of the spigot.
Jenn: Got this lilac for you.
What do you think?
Colleen: Wow.
I love it.
Jenn: How beautiful is that?
Colleen: It's so bright.
Jenn: I know.
Smell that fragrance.
Colleen: It smells really good, yeah.
Jenn: So awesome.
So what I'm going to do is stick it -- I'm gonna take it out of the pot.
Colleen: Alright.
Jenn: I'm going to tip it over.
Oh, sweet.
Comes off pretty easy.
It's not too root-bound.
Actually, I have in my pocket here -- So, just take a rake, go around the sides.
You want to try and see what it feels like?
Colleen: Sure, yeah.
Okay.
It's a little tough.
Jenn: Yeah.
But, so all these little hairs, all these little roots, they'll be able to reach out into the into the soil then.
Colleen: Yeah.
Jenn: Right?
Colleen: Oh, that's awesome.
Jenn: So we got that.
And then I'm gonna lay that down for a second, because I want to put a little compost in the hole.
Colleen: Okay.
Jenn: Then...
I think that's good, because we're gonna build this side up.
Colleen: Okay.
Jenn: I don't want it too low.
So, yeah, just back-fill it.
Nathan: Look at this.
You guys are cruising.
Jenn: Hey, Nathan.
Nathan: How's it going?
Jenn: Pretty good.
Colleen: Great.
Nathan: Perfect plant for the perfect spot.
Jenn: Yeah, it's a lilac.
Nathan: Need any help?
Jenn: No, we're all set.
I think we got it under control.
Richard: Hey, Nathan.
Jenn: Nice structure.
Nathan: Hey, Richard.
Richard: You can give me a hand, actually.
Nathan: Yeah, I can help out.
Richard: I'm going to cut this line inside.
Just pull the old faucet out.
Then we got to talk about trimming out the new one.
Nathan: Okay.
♪♪ Richard: Okay, take it out.
Nathan: I got it.
Richard: Okay.
Nathan: Alright, so I have this cedar block that I cut out with a 2-inch hole in the middle, and I'm going to use it as a template, but I'm also going to inlay this into the wall.
And it's going to give us a perfect surface to mount our hot and cold faucet.
♪♪ I've added some flashing tape to protect the wallboard behind the cedar block.
♪♪ ♪♪ Richard: Perfect.
Now we can add the mounting bracket for the hydrant, and slide the entire configuration through the wall to the hot and cold lines inside.
♪♪ And there's a little set screw at the bottom.
Alright.
So now it is time for finishes.
You know, a lot of people would just pick a nice, simple hand shower.
But Colleen picked out something really amazing.
I love this.
Gavin: Yeah.
Richard: Black finish.
It's got the shower head here and then a hand shower.
Gavin: Awesome.
Richard: It's beautiful.
Gavin: It looks great.
Richard: Okay, so this is the way it's going to connect for us.
We're going to make this connection right here and then run a hose down to our new faucet.
Gavin: Oh, okay.
Okay.
Richard: But that doesn't really look that good.
You don't want to see that, do you?
Gavin: Not really.
Richard: Okay, you admit it.
So how about this?
Gavin: Oh, wow.
Richard: Surf's up.
Gavin: That looks awesome.
Richard: Here on the Cape.
Gavin: Yeah.
Richard: So what we can do is drill a hole and then mount this like this.
Okay?
Then the hose will come down the bottom.
So now you can use it all summer.
And at the end of the season, you can turn it off, break the connection to the hose.
Gavin: Okay.
Richard: Lift the whole thing, take it right inside the building so you don't have to worry about the varnish.
We don't want you varnishing your surfboard.
Gavin: That's great.
Richard: Alright?
Does that work?
Gavin: That's awesome.
Richard: Good.
Let's drill a hole.
There we go.
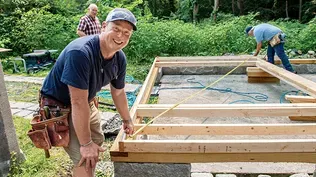
Mark: For the base of the shower, I've got this great slab of bluestone that we can cut the drain holes into.
Anywhere in that area is great.
♪♪ All you guys have to do is line up your edge.
Jenn: Yep.
Mark: Nope, so we're just going to want to -- Jenn: Then we're gonna adjust it.
Mark: So, Colleen, you can measure the distance between the post and the stone.
Okay, now we've set our height for everything else.
Yep.
♪♪ Alright, outside edge right there.
Go right down, Jenn.
Perfect.
Jenn: Yep.
Mark: Okay.
Square up.
♪♪ Jenn: Awesome.
♪♪ Richard: Good.
♪♪ ♪♪ ♪♪ Jenn: So, the shower is complete.
Gavin: It looks amazing.
Colleen: We love it.
Richard: Alright.
The rule is the homeowners always get the owners to do it first, okay?
Do you know how to use it?
Colleen: Not yet.
Richard: Alright, so, it's so simple.
The outer knob is the on and off, okay?
And the inner one right here with that dial is temperature.
Alright?
So give it a try.
I'm going to get out of the way.
Alright, then there's a diverter.
Colleen: Okay.
Richard: Okay?
Isn't that cool?
Colleen: Works great!
Richard: Hey, it works.
And that's tall enough for you.
Gavin: Yeah.
I appreciate that.
Jenn: Fantastic.
Richard: Alright, so, care and feeding of this thing is pretty simple.
At the end of the season, it's so simple.
You -- All you have to do is break the hose off.
Gavin: Sure.
Richard: Lift it, Take it down into the basement, keep it out of harm's way for the winter, and then bring it back in the spring.
You're done.
Gavin: Awesome.
Jenn: We're so happy to give this to you guys.
Gavin: Thank you all so much.
Colleen: Thank you so much.
Gavin: We really appreciate it.
It's been amazing.
Jenn: So, if you've got questions, keep them coming, because we would love to hear from you.
But for now, I'm Jenn Nawada.
Nathan: I'm Nathan Gilbert.
Mark: I'm Mark McCullough.
Richard: And I'm Rich Trethewey for "Ask This Old House," saying goodbye on behalf of Raffi, too.
Jenn: Raffi.
Nathan: Attaboy, Raffi.
♪♪ ♪♪ Kevin: Next time on "Ask This Old House"... Lee calls on an arborist to help with a sick pine tree.
Arborist: We're definitely dealing with a fungus here, and there are a few management plans that you can do.
Kevin: Then I follow up with other common tree diseases.
And are you overwhelmed with your new home purchase?
Nathan has a checklist for you.
Nathan: I'm going to check the shingles.
I'm going to check the gutters.
I'm going to check the chimneys.
Kevin: All that on "Ask This Old House."


Funding for THIS OLD HOUSE is provided by The Home Depot and Renewal By Andersen.